

Google is finally closing the gap between e-commerce catalogs and service-based lead generation. Historically, if you wanted to run dynamic, multi-asset ads that updated automatically based on a product list, you needed a Google Merchant Center (GMC) account. This was a non-starter for SaaS companies, real estate agencies, and educational institutions. They don't have physical inventory; they have seats, listings, and courses.
With the recent rollout of Business Data Feeds for Demand Gen, that friction is gone. You can now feed a simple Google Sheet or CSV directly into the Demand Gen engine. This allows you to serve personalized, high-intent creative across YouTube Shorts, Discover, and Gmail without the rigid compliance hurdles of GMC. By the end of this guide, you will have a live, automated data feed powering your middle-of-funnel campaigns, even if you've never sold a physical product in your life.
Why it matters: This update democratizes the 'dynamic' look and feel of retail ads for the rest of the market. It means your B2B software features or your travel agency's seasonal packages can now appear in the same high-converting, scrollable formats that were previously reserved for sneaker brands.
TL;DR
- Skip the Merchant Center: You no longer need a retail-specific GMC account to run product-style dynamic ads.
- Spreadsheet Power: Use a standard CSV or Google Sheet to define your 'items' (services, seats, or courses).
- Automated Creative: Demand Gen will automatically pull headlines, descriptions, and images from your feed to match user intent.
- Cross-Channel Reach: These feeds populate across YouTube Shorts, the Home Feed, and Google Discover.
Step 1: Selecting and Structuring Your Data Schema
Before you touch the Google Ads interface, you must decide what your 'items' are. In the retail world, an item is a SKU. In your world, an item is a conversion unit. If you’re a SaaS brand, your items might be specific features (e.g., 'Automated Reporting', 'CRM Integration'). If you’re in higher education, your items are degree programs.
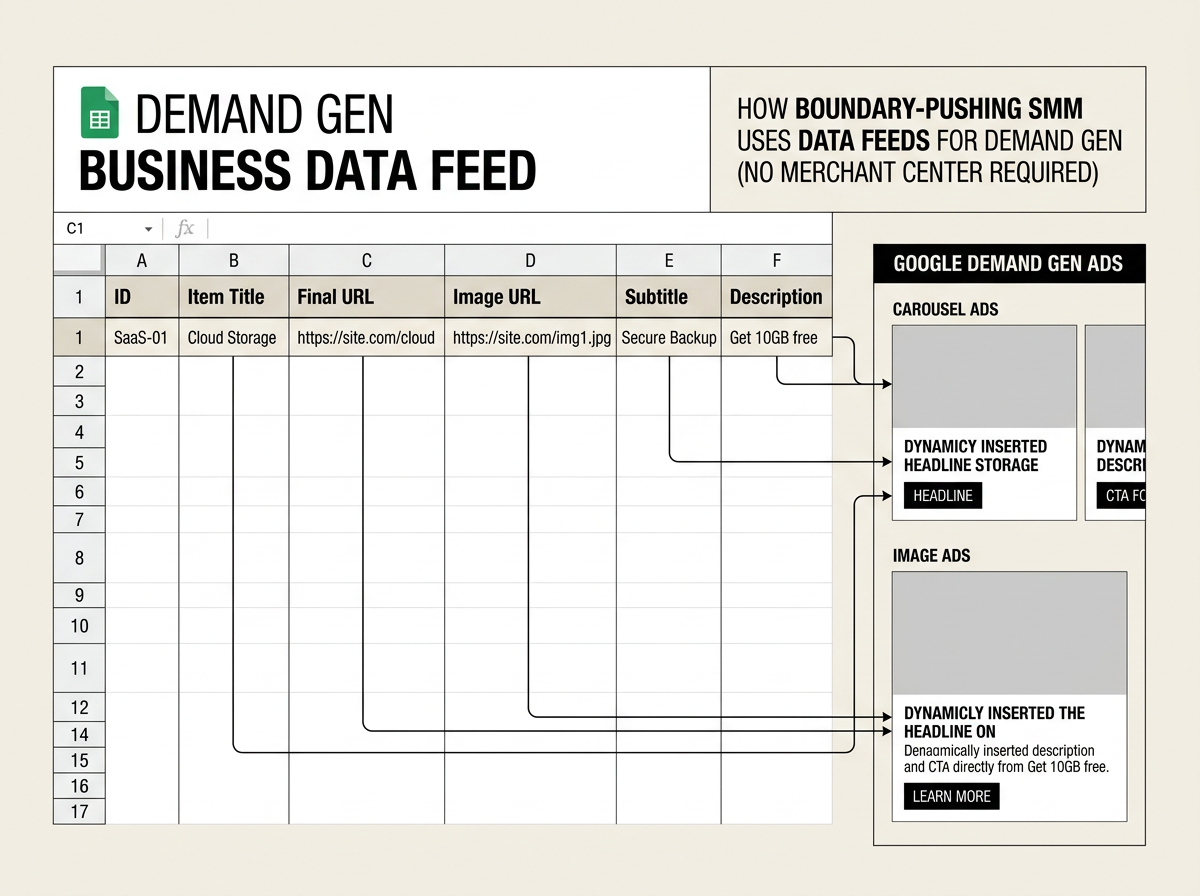
Google provides a specific template for Business Data, but for Demand Gen, you need to focus on six core attributes: Item ID, Item Title, Final URL, Image URL, Subtitle, and Description. Unlike the strict GMC requirements, you have more creative liberty here. You aren't being checked against a physical inventory bot; you're being checked for policy compliance and landing page relevance.
What to do: Open a new Google Sheet. Create headers for ID, Item title, Final URL, Image URL, Item subtitle, and Item description. Populate at least 10 rows. This volume is critical because Demand Gen’s AI needs enough variety to test which 'product' resonates with specific audience segments.
Why it matters: A feed-based approach allows for 'Creative Agility'. Instead of building 10 separate ads for 10 services, you build one Demand Gen campaign that pulls from a feed of 10 items. This consolidates your data and helps the algorithm learn faster.
Common pitfall: Using generic image URLs. Google’s AI is increasingly sensitive to image quality. If your Image URL points to a low-res thumbnail, your Quality Score will crater. Use 1200x628 or 1080x1080 high-fidelity assets hosted on your own CDN.
Step 2: Uploading the Feed to the Business Data Library
Once your spreadsheet is ready, you need to tell Google Ads where to find it. You aren't uploading this at the campaign level—you're uploading it at the account level in the 'Business Data' section. This is a critical distinction. Account-level feeds can be reused across multiple Demand Gen campaigns, allowing for different targeting strategies (e.g., one for prospecting, one for remarketing) using the same source of truth.
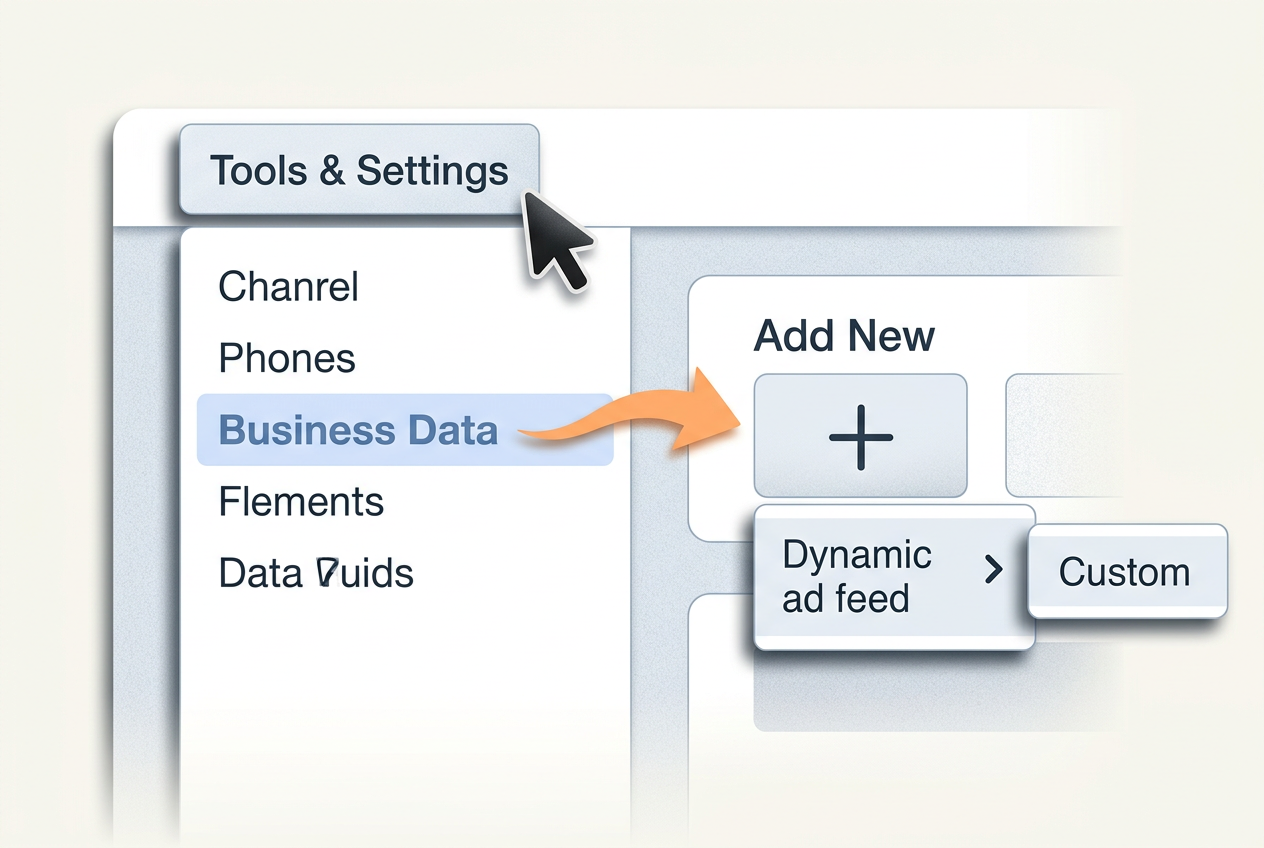
What to do: Navigate to Tools and Settings > Setup > Business Data. Click the plus button and select 'Dynamic ad feed'. From the dropdown, choose 'Custom'. This is the 'secret sauce' for non-retailers. By selecting 'Custom', you bypass the retail-specific fields like 'Price' or 'Availability' that often cause feed rejections for service brands.
Link your Google Sheet directly rather than uploading a static CSV. This ensures that when you update a headline in your sheet, the change reflects in your ads within 24 hours.
Why it matters: Automation is only as good as its maintenance. By linking a live sheet, you reduce the manual overhead of campaign management. This mirrors the shifts we see in other platforms; for instance, TikTok Shop's embrace of AI video shows a broader industry trend toward feed-driven, automated creative assets.
Common pitfall: Permissions. Ensure the Google Ads service account (usually an email address provided during the link process) has 'Viewer' access to your Google Sheet. If it doesn't, the feed will stay in 'Pending' status indefinitely.
Step 3: Mapping Attributes for Demand Gen Creative
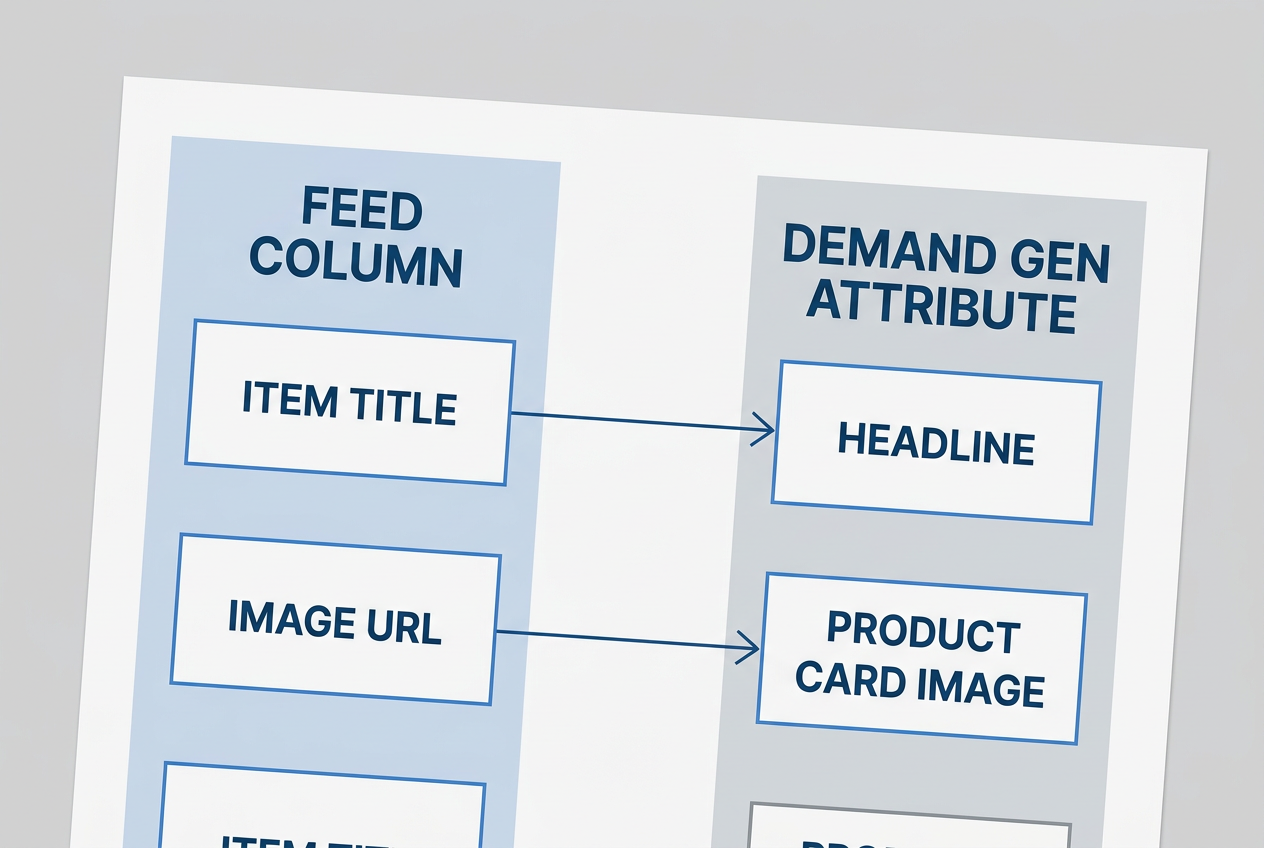
After the upload, Google will ask you to map your columns to its internal attributes. This is where many B2B marketers get confused. Because you chose a 'Custom' feed, Google doesn't automatically know that your 'Service Name' column should be the 'Item title'.
What to do: In the mapping interface, ensure your Item title maps to the headline of the ad. Your Item description should be mapped to the long-form text. Most importantly, ensure your Image URL is mapped to the 'Main Image' attribute.
Demand Gen uses these mappings to generate 'Product Cards'. These cards appear in a carousel format on the YouTube Home feed and as immersive, clickable overlays on YouTube Shorts. If your mapping is off, your 'Product Card' might show a URL where a headline should be.
Why it matters: Demand Gen is a visual-first format. According to internal Google data, campaigns using feeds see a 20% higher conversion rate compared to those using only static image assets. This is because the feed allows for a 'shopping' experience even when the user isn't technically shopping for a physical product.
Common pitfall: Mapping a 'Price' column that contains text like 'Contact us'. If you include a price field in a custom feed, it must be a numerical value. If your pricing is opaque, leave the column out entirely and put your CTA in the description.
Step 4: Configuring the Demand Gen Campaign with Feed Logic
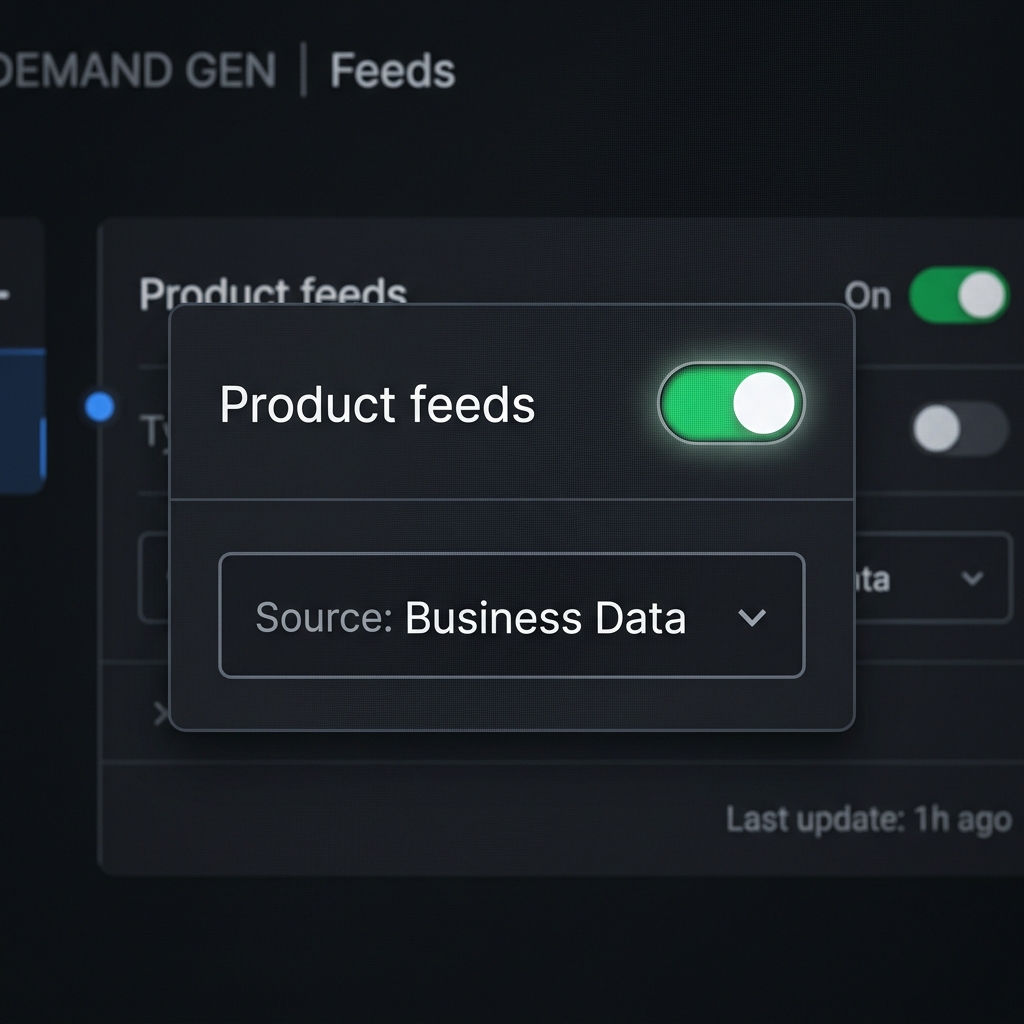
Now that your feed is live and mapped, it’s time to build the campaign. When you create a new Demand Gen campaign, you will see a toggle for 'Product feeds'. Even though you aren't a retailer, you will toggle this to ON.
What to do: Select 'Use a feed from Google Ads' (the Business Data feed you just created) rather than 'Google Merchant Center'. At the ad group level, you can then use 'Item filters'. This is an advanced tactic: you can create one ad group that only shows 'Enterprise' features from your feed and another that only shows 'Small Business' features, based on a 'Category' column in your spreadsheet.
Set your bidding to 'Maximize Conversions'. Since you are providing Google with a rich data set via the feed, the algorithm can more easily identify which users are likely to click on specific items. This is particularly effective when combined with Google's 'First-party data' segments.
Why it matters: This allows for hyper-segmentation without the need for dozens of creative files. You are essentially using the feed as a dynamic creative optimization (DCO) tool. This is vital as platforms move toward more opaque, AI-driven reporting, a trend noted in recent discussions regarding Google's AI search click data.
Common pitfall: Forgetting to add 'Global' assets. A Demand Gen ad still requires at least one static image and one video that aren't in the feed. These serve as the 'fallback' if the feed fails to load or if the placement doesn't support carousel cards.
Step 5: Verification and Post-Launch Optimization
How do you know it's working? Unlike standard ads, feed-based ads have a 'Product' tab in the reporting interface. If you don't see data appearing there after 48 hours, something is wrong with your feed connection.
What to do: Check the 'Diagnostics' tab within the Business Data section. It will flag specific rows that are 'Disapproved'. Common reasons include 'Destination Mismatch' (the URL in the feed doesn't match the domain of the display URL) or 'Image Quality'.
Once live, look at the 'Item' level report. You might find that one specific service or 'item' in your feed is driving 80% of the clicks. When this happens, don't delete the other items—instead, optimize the landing pages for the underperforming items to improve the 'Post-click' experience.
Verification Checklist:
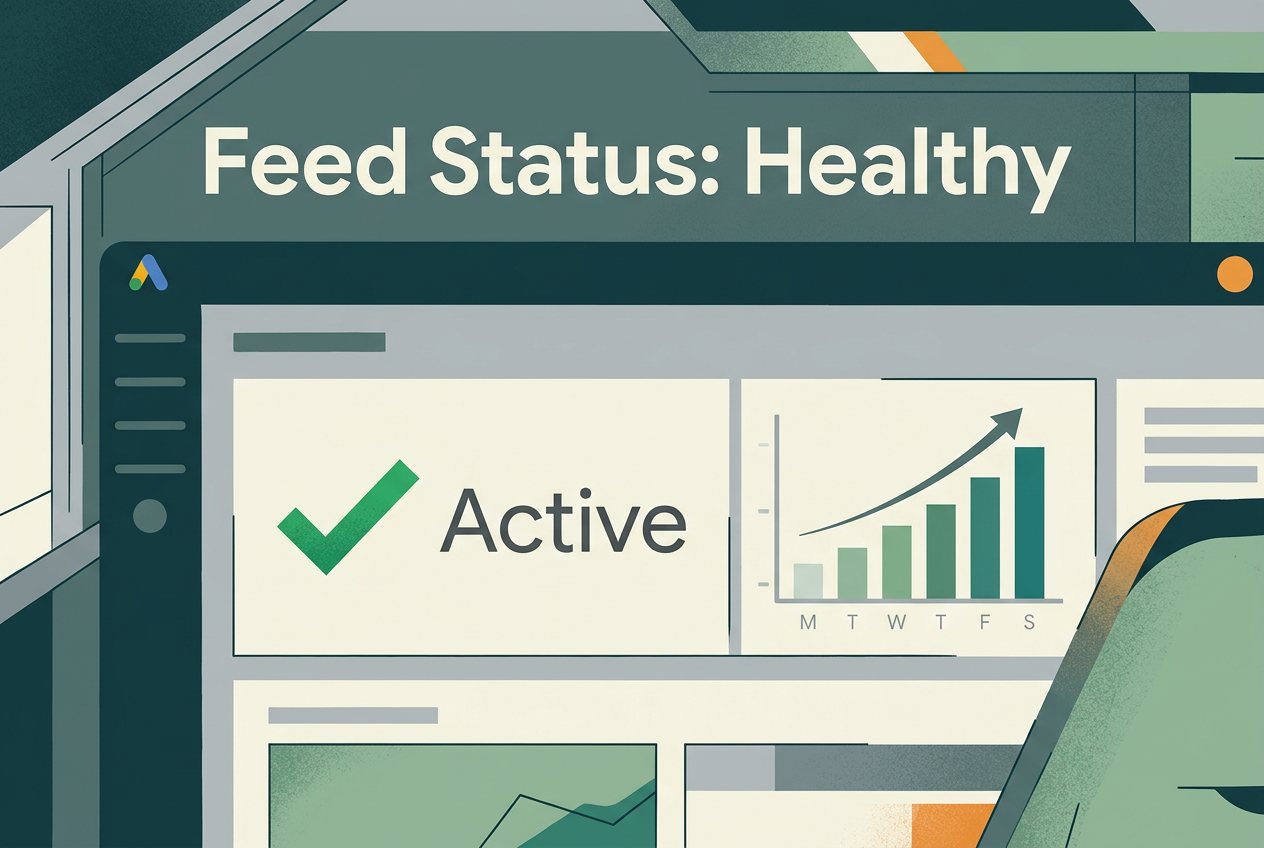
- Status in Business Data says 'Active'.
- Campaign 'Ads' tab shows 'Multi-asset' ads with 'Attached Feed'.
- YouTube Preview tool shows the carousel cards appearing below the video player.
Three Related Tactics to Try Next
Once you’ve mastered the basic Business Data feed, you can push the automation further to stay ahead of the competition.
- Dynamic Remarketing for B2B: Use your feed to retarget users who visited specific sub-pages of your site. If a user spent three minutes on your 'Pricing' page, show them a Demand Gen ad featuring the 'Free Trial' item from your feed. This mimics the 'abandoned cart' logic of e-commerce for a lead-gen funnel.
- Seasonal Feed Swaps: Instead of editing ads for a holiday promotion, simply update your Google Sheet with new 'Item titles' and 'Image URLs'. The ads will update automatically, preserving the historical data and 'learning' of the campaign while showing fresh creative.
- Geo-Targeted Feeds: If your services vary by region, add a 'Region' column to your feed. Use ad group filters to ensure users in New York only see items relevant to their location, while users in London see another set. This is a massive time-saver for franchise-based businesses or international service providers.
As Google continues to integrate AI into every facet of the dashboard—from [INTERNAL: NotebookLM-style scraping concerns -> google-notebooklm-scraping] to automated search features—the marketers who provide the best, most structured data will win. Business Data feeds are the most direct way to give Google's AI the structure it craves.
FAQ